

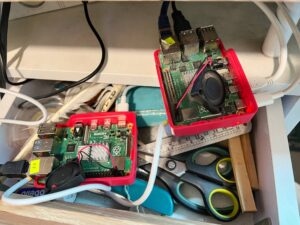
Raspberry Pi Kubernetes cluster with Cilium CNI Seems very flexible
I need to do a proof of concept with a good container network plugin (CNI) while our on prem server room is getting fixed. This is No reason to stop working. The previous kubernetes cluster used the Flannel plugin. But flannel suffers from changes due to growth and hardware variety. Flannel install templates are not idempotent, so when you run them again with new settings they utterly brake your Kubernetes Cluster! So I am trying to use Raspberry Pi kubernetes to setup a replacement. I used Raspberry pi 4 8 gb k8s cluster
We researched popular Kubernetes CNi plugins. Calico seems like a good option, but it only works in a network with professional routers that support BGP and the POC is going to be done at home.
I read up on the newest CNI called Cilium, Cilium makes use of a new secure sandbox technology available in the recent versions of the Linux Kernel called eBPF. So, Raspberry Pi Kubernetes can use Cilium, and apparently extremely large clusters too, whether ARM64 or regular Intel AMD64 style, even 32 bit. However, don’t write off using Raspberry Pi as Kubernetes nodes, as Raspberry Pi and other IOT edge devices will are becoming more and more important, this in addition to smart cities.
MetalLB Load Balancer completes the configuration of your Raspberry Pi Kubernetes cluster
To complete the Raspberry Pi Kubernetes cluster, I added installing Metallb Load Balancer that allows you to easily expose APIs or Websites with an external IP address.
Raspberry Pi OS as the base for Kubernetes
Start by installing the 64 bit Raspberry PI OS on SSD card for each Pi in the cluster, Then boot and login to the Master. I Named the Master kubemaster and nodes some simple numbered system, if you use the same naming for the master and nodes, you might get confused, I did.
Login and update / upgrade the OS.
apt update && apt upgrade -y
reboot then run the upgrade again
Run “apt autoremove” if it says to
After you have upgraded install the screen app. Run the screen command so that your session and upgrades are not disrupted.
sudo apt-get install screen
Now we can start the work to install kubernetes cluster on Raspberry Pi. I used Ethernet cables, but it should work with the Wifi too. You just need to make sure that the cluster initiation is connected to the correct NIC. So record all IP addresses. I put tiny stickers on the ethernet connection on the pi, BTW you should reserve the IP addresses if your network DHCP often changes them.
Compile and propagate the kernel with 48 bit page
Cilium expects larger pages of memory, the size of 48 bits required by Cilium is set smaller for Raspberry Pi. So, the kernel needs to be re-compiled and the kernel and module dependencies copied to all Pi nodes. I realized this only after deploying kubernetes, when I tried to deploy the Cilium CNI, I found some errors, as follows:
root@kubemaster:~# kubectl get pods -A
NAMESPACE NAME READY STATUS RESTARTS AGE
kube-system cilium-ln87t 0/1 CrashLoopBackOff 4 (8s ago) 2m57s
kube-system cilium-operator-69b677f97c-5flmt 1/1 Running 0 2m57s
(edited)
Warning Unhealthy 8m43s (x4 over 8m49s) kubelet Startup probe failed: Get "http://127.0.0.1:9879/healthz": dial tcp 127.0.0.1:9879: connect: connection refused

https://github.com/google/tcmalloc

https://github.com/raspberrypi/linux/issues/4375#issuecomment-863931118
The discussions above had the following:
I recompiled the kernel with CONFIG_ARM64_VA_BITS_48 = y. It works.
I am currently testing it as a kubernetes worker node (k8s 1.21.1, containerd 1.4.4), with raspbian os 32 bit, armv8 core, the node runs 32/64 bit containers. I will monitor the system for a few days, if there are no problems I will install the new kernel on the other rpi3/4 nodes. I don’t seem to have noticed any performance issues or failing services.
Orange Pi 5
(One year later July 2023) Due to Raspberry pi ditribution issues, I purchased an Orange Pi 5 with only 4 gb of memory. I am making this the control plane master, with the 2 Raspberry pi 4 with 8GB of memory as the worker nodes. I hope to make some edge stuff too, like sound and camera.
Build Raspberry Pi Kernel
Here in the beginning of the project is a good place to compile the kernel, although it is only required for installing Cilium. If you are using a different CNI you might be able to skip this.
To compile a new kernel, you need to:
- download the git repo for Raspberry Pi
- make
- edit a file
- make the kernel
- install kernel by copying it
- editing another file
Be sure to run all of this after the screen command is running. build can take a long time. I did it on the pi itself, they say that if you do the build on a faster PC that it will go faster.
So run:
screen
sudo apt install git bc bison flex libssl-dev make ncurses-devel libncurses-dev
git clone --depth=1 https://github.com/raspberrypi/linux
cd linux
KERNEL=kernel8
make bcm2711_defconfig
vi .config
CONFIG_ARM64_VA_BITS_48=y

CONFIG_ARM64_VA_BITS=48
make -j4 Image.gz modules dtbs
sudo make modules_install
sudo cp arch/arm64/boot/dts/broadcom/*.dtb /boot/
sudo cp arch/arm64/boot/dts/overlays/*.dtb* /boot/overlays/
sudo cp arch/arm64/boot/dts/overlays/README /boot/overlays/
sudo cp arch/arm64/boot/Image.gz /boot/kernel8-48bit.img
Instead of Bios Raspberry Pi OS uses /boot/config.txt
Newer Raspberry Pi OS uses /boot/firmware/config.txt
In the last command we copied the new kernel without overwriting the default kernel8.img file. So you need to tell the “bios” which kernel to boot from. I learned that Raspberry pi OS uses the /boot/config.txt instead of Bios. This makes it really easy to switch your projects by changing the Micro SD card.
Add the following line to your /boot/config.txt file
kernel=kernel8-48bit.img
Now reboot your Raspberry pi and hope that it boots.
Now you need to propagate the new kernel and it’s built modules to all of your Raspberry pi nodes.
Copy to the nodes:
/boot/kernel8-48bit.img
/usr/lib/modules/5.15.65-v8-48bits+
The exact name of the newly built 48bits modules might be different
Remember to edit the config.txt on each node.
If I had a lot of nodes or need to constantly repeat this task, I would automate with ansible.
Now you can continue towards your Kubernetes cluster on Raspberry pi.
Orange pi
Armbian uses “/boot/armbianEnv.txt”
I set this to the following to use v1 of cgroups since the default is v2, but I am not sure this really helped. the error
Qad 19 00:51:42 orangepi5 kubelet[1045]: E0719 00:51:42.078414 1045 remote_runtime.go:176] "RunPodSandbox from runtime service failed" err="rpc error: code = Unknown desc = failed to create containerd task: failed to start shim: start failed: io.containerd.runc.v2: failed to load cgroup true: cgroups: cgroup deleted: exit status 1: unknown"
Qad 19 00:51:42 orangepi5 kubelet[1045]: E0719 00:51:42.078615 1045 kuberuntime_sandbox.go:72] "Failed to create sandbox for pod" err="rpc error: code = Unknown desc = failed to create containerd task: failed to start shim: start failed: io.containerd.runc.v2: failed to load cgroup true: cgroups: cgroup deleted: exit status 1: unknown" pod="kube-system/kube-scheduler-orangepi5"
I set the “/boot/armbianEnv.txt”
verbosity=1
bootlogo=false
overlay_prefix=rockchip-rk3588
fdtfile=rockchip/rk3588s-orangepi-5.dtb
rootdev=UUID=20342bdf-c49c-4cb9-905e-7f151bf49a82
rootfstype=ext4
cgroup_enable=memory
cgroup_memory=1
extraargs=systemd.unified_cgroup_hierarchy=0
usbstoragequirks=0x2537:0x1066:u,0x2537:0x1068:u
root@orangepi5:~#
Disable Swap File
Disabling Swap in Raspberry Pi is more effort than other Debian variants. You need disable it with dphys-swapfile and configure the swap config to 0.
# disable swap
sudo dphys-swapfile swapoff && \
sudo dphys-swapfile uninstall && \
sudo update-rc.d dphys-swapfile remove
Now edit the config file. use your favorite editor. I use vi
vi /etc/dphys-swapfile

change line to CONF_SWAPSIZE=0
For Armbian Jammy disable swap with
systemctl mask dev-zram1.swap
vim /etc/default/armbian-zram-config
A few lines down the file, uncomment the line that says SWAP=false:
reboot
free -h
Set IP and Mac address in Armbian
After rebooting the Orange pi I noticed that the IP address had changed. I set this with NMCLI command. Armbian is using NetworManager
so change the following for your setup.
$ nmcli con show
NAME                UUID                                  TYPE      DEVICE

Wired connection 1  e4fa105b-a5dd-3a17-bd39-0bb9945cbaf2  ethernet  eth0

$ nmcli con modify "Wired connection 1" 802-3-ethernet.cloned-mac-address YOURCURRENT MAC ADDRESS
Configure Cgroups and install Containerd
Kubernetes uses cgroups to control resources. It is not optional. We are going to use the default of containerd for running kubernetes 1.25 , so it needs to be set for Containerd, so kubernetes can control stuff, especially the memory with it.
I won’t further complicate things by giving the option to use Docker instead of containerd.
Raspberry Pi OS is configured to use cgroups for most things, except for memory, Cgroup memory controlling is needed by Kubernetes. After you enable it, Containerd also needs to know about it.
Raspberry pi uses the /boot/cmdline.txt for startup command that passes parameters to the Linux kernel.
Run:
sudo echo " cgroup_enable=memory cgroup_memory=1" >> /boot/cmdline.txt
You can check the startup command line with
cat /boot/cmdline.txt
reboot
cat <<EOF | sudo tee /etc/modules-load.d/containerd.conf
overlay
br_netfilter
EOF
The following modprobe commands will only work if you correctly copied the modules directory to the nodes. Overlay and br_netfilter have module issues that the new modules need to be in the correct location.
sudo modprobe overlay
sudo modprobe br_netfilter

cat <<EOF | sudo tee /etc/sysctl.d/99-kubernetes-cri.conf
net.bridge.bridge-nf-call-iptables = 1
net.ipv4.ip_forward = 1
net.bridge.bridge-nf-call-ip6tables = 1
EOF

sudo sysctl --system

sudo apt-get update
sudo apt-get -y install containerd
sudo apt-get -y install containerd
sudo mkdir -p /etc/containerd
containerd config default | sudo tee /etc/containerd/config.toml
Next, edit the containerd config file that you just created
vi /etc/containerd/config.toml

# do the following

#look for the line - search for "options" - seems like line 96
#[plugins."io.containerd.grpc.v1.cri".containerd.runtimes.runc.options]
#
#then add the line under
# SystemdCgroup = true
#
# should look like the following with the S of Systemd under the l from plugins,
# the file is much more indented than here.
#
 [plugins."io.containerd.grpc.v1.cri".containerd.runtimes.runc.options]
   SystemdCgroup = true
Linux Kernel needs to properly load containerd to use. So, restart containerd and check that it’s ok.
Armbian Orange pi
This might be required for raspberry pi os too, as stuff might have changed, but I needed to update shim stuff too in /etc/containerd/config.toml the answer to getting it started was replacing ShimCgroup = “true”
/etc/containerd/config.toml
[plugins.”io.containerd.grpc.v1.cri”.containerd.runtimes.runc.options]
ShimCgroup = “”
sudo systemctl restart containerd
systemctl status containerd.service
Cri-O confuses the universe and won’t seemlessly work with kubernetes if you don’t set it to use the correct socket, so run:
crictl config runtime-endpoint unix:///var/run/containerd/containerd.sock
It seems that containerd apt package doesn’t require crictl, so install it from github. Presently I did.
wget https://github.com/kubernetes-sigs/cri-tools/releases/download/v1.27.1/crictl-v1.27.1-linux-arm.tar.gz
gunzip crictl-v1.27.1-linux-arm.tar.gz
tar xvf crictl-v1.27.1-linux-arm.tar
mv crictl /usr/local/bin/
crictl --version
Install Kubernetes
Initiate the Master
https://kubernetes.io/docs/setup/production-environment/tools/kubeadm/install-kubeadm/
sudo apt-get update
apt-transport-https may be a dummy package; if so, you can skip that package
sudo apt-get install -y apt-transport-https ca-certificates curl gpg
87 curl -s https://packages.cloud.google.com/apt/doc/apt-key.gpg | sudo apt-key add
88 cat <<EOF | sudo tee /etc/apt/sources.list.d/kubernetes.list\ndeb https://apt.kubernetes.io/ kubernetes-xenial main\nEOF
89 apt update
90 cd /etc/apt/sources.list.d
91 rm docker.list
92 curl -s https://packages.cloud.google.com/apt/doc/apt-key.gpg | sudo apt-key add
93 apt update
94 sudo apt-get install -y apt-transport-https ca-certificates curl gpg
95 curl -fsSL https://pkgs.k8s.io/core:/stable:/v1.29/deb/Release.key | sudo gpg –dearmor -o /etc/apt/keyrings/kubernetes-apt-keyring.gpg
96 echo ‘deb [signed-by=/etc/apt/keyrings/kubernetes-apt-keyring.gpg] https://pkgs.k8s.io/core:/stable:/v1.29/deb/ /’ | sudo tee /etc/apt/sources.list.d/kubernetes.list
97 sudo apt-get update
98 sudo apt-get install -y kubelet kubeadm kubectl
99 apt-mark hold kubelet kubeadm kubectl
100 systemctl enable –now kubelet
101 kubeadm
Join the node to the Cluster
Unless you have DNS entries for your pis, you need to add them to your /etc/hosts file. Use correct information, not what’s below. Raspberry pi likes to assign the hostname to 127.0.1.1 . I just left that and added the other nodes with real ip addresses.
 /etc/hosts
#127.0.1.1 kubemaster
#172.21.0.47 raspberrypi2
We ran above crictl command to tell it to use the correct socket so we won’t need –cri-socket unix:///var/run/containerd/containerd.sock. As this is a POC we can safely run –token-ttl=0 which creates a token that lasts forever, consider not using it for a real environment.
From Here the instructions are different for the Nodes and Master, First we initiate the master.
kubeadm init --token-ttl=0 --skip-phases=addon/kube-proxy
You will be instructed to use the newly created Kubernetes credentials, like the following. Also be sure to copy the “Join” command at the end of the initialization output.
mkdir -p $HOME/.kube
sudo cp -i /etc/kubernetes/admin.conf $HOME/.kube/config
sudo chown $(id -u):$(id -g) $HOME/.kube/config
or
export KUBECONFIG=/etc/kubernetes/admin.conf
Without CNI coredns pods are stuck ! So don’t be annoyed that your coredns pod is stuck.
You won’t be able to run anything on nodes until you have Network Overlay. We are using Cilium, as Flannel is fickle and Calico requires fancy network equipment so won’t work for our POC.
Node Install
Everything is the same as installing the Master Control Plane including needing the compiled kernel and modules, until the kubeadm command, For joining the nodes use the copied command from the kubeadm init on the master. Although it won’t work without CNI, It’s best to connect a Node to the Cluster. When you finish installing Cilium CNI everything will start working together as a cluster.
kubeadm join ........
Finally Install the Cilium CNI
The default installation with cilium doesn’t allow for ingress and load balancer. This is because the kube-proxy doesn’t use cilium correctly. So the kubernetes deployment needs to leave out kube-proxy. Instead of this, cilium uses it’s own methods, which likely work faster, as it is not side-carted like other CNIs, as cilium communicates directly through the kernel and does not need iptables for it’s routing like side carted ingress.
The following cilium installation code also installs Cilium CNI.
Add Cilium https://docs.cilium.io/en/stable/
# https://docs.cilium.io/en/stable/gettingstarted/k8s-install-default/
CILIUM_CLI_VERSION=$(curl -s https://raw.githubusercontent.com/cilium/cilium-cli/master/stable.txt)
CLI_ARCH=arm64
if [ "$(uname -m)" = "aarch64" ]; then CLI_ARCH=arm64; fi
curl -L --fail --remote-name-all https://github.com/cilium/cilium-cli/releases/download/${CILIUM_CLI_VERSION}/cilium-linux-${CLI_ARCH}.tar.gz{,.sha256sum}
sha256sum --check cilium-linux-${CLI_ARCH}.tar.gz.sha256sum
sudo tar xzvfC cilium-linux-${CLI_ARCH}.tar.gz /usr/local/bin
rm cilium-linux-${CLI_ARCH}.tar.gz{,.sha256sum}
Install Helm on the master, so that you can deploy cilium
curl https://baltocdn.com/helm/signing.asc | gpg --dearmor | sudo tee /usr/share/keyrings/helm.gpg > /dev/null
sudo apt-get install apt-transport-https --yes

echo "deb [arch=$(dpkg --print-architecture) signed-by=/usr/share/keyrings/helm.gpg] https://baltocdn.com/helm/stable/debian/ all main" | sudo tee /etc/apt/sources.list.d/helm-stable-debian.list
sudo apt-get update
sudo apt-get install helm
Now add the Cilium repo to your new Helm installation
helm repo add cilium https://helm.cilium.io/
Run the Cilium Helm deployment with correct environment variables.
USE correct api server address. This is likely your master server, unless you specified otherwise in your Raspberry Pi Kubernetes deployment. You need to use Cilium version 1.12 or above, as previously it didn’t support Egress and Load Balancing.
API_SERVER_IP=<YOUR API SERVER IP>
# Kubeadm default is 6443
API_SERVER_PORT=6443
helm install cilium cilium/cilium –version 1.12.1 \
–namespace kube-system \
–set kubeProxyReplacement=strict \
–set k8sServiceHost=${API_SERVER_IP} \
–set k8sServicePort=${API_SERVER_PORT}
Verify that cilium is up and running.
kubectl -n kube-system exec ds/cilium -- cilium status | grep KubeProxyReplacement
or with verbose
kubectl -n kube-system exec ds/cilium -- cilium status --verbose
Deploy a stateless nginx on Your Raspberry Pi Kubernetes cluster with Cilium
We will follow the directions from the following link, it guides you into making a node port. Other docs tell you how to use a load balanacer with set IP Address.
https://docs.cilium.io/en/stable/gettingstarted/kubeproxy-free/#kubeproxy-free
kubectl apply -f https://k8s.io/examples/application/deployment.yaml

kubectl expose deployment nginx-deployment --type=NodePort --port=80

kubectl -n kube-system exec ds/cilium -- cilium service list

node_port=$(kubectl get svc nginx-deployment -o=jsonpath='{@.spec.ports[0].nodePort}')

curl 127.0.0.1:$node_port
Load Balancing and Egress for external traffic: MetalLB
When I started this project I thought that I would use the Cilium Egress feature, However, this requires a router that supports iBGP, which most of Ya’ll don’t have. So I went back to using MetalLB, which previously worked with the Flannel CNI.
Install Hubble for cilium visibility, it shows low level whats happening
export HUBBLE_VERSION=$(curl -s https://raw.githubusercontent.com/cilium/hubble/master/stable.txt)
HUBBLE_ARCH=amd64
if [ "$(uname -m)" = "aarch64" ]; then HUBBLE_ARCH=arm64; fi
curl -L --fail --remote-name-all https://github.com/cilium/hubble/releases/download/$HUBBLE_VERSION/hubble-linux-${HUBBLE_ARCH}.tar.gz{,.sha256sum}
sha256sum --check hubble-linux-${HUBBLE_ARCH}.tar.gz.sha256sum
sudo tar xzvfC hubble-linux-${HUBBLE_ARCH}.tar.gz /usr/local/bin
rm hubble-linux-${HUBBLE_ARCH}.tar.gz{,.sha256sum}
Now Install Metal LB so you can use your local IP Pool without a BGP router
kubectl create secret generic -n metallb-system memberlist --from-literal=secretkey="$(openssl rand -base64 128)"
secret/memberlist created

helm repo add metallb https://metallb.github.io/metallb

helm install metallb metallb/metallb
Now create 2 seperate yaml files and apply them. For IP Addresses use some from your own pool. It’s also wise to block them off in your router. I had first used old yaml config files for metallb and I got <pending> forever instead of an external IP address.
vi metallb-layer-2-config-home-net.yml
apiVersion metallb.io
v1beta1
kind IPAddressPool
metadata
name first-pool
spec
addresses
– 172.17.2.223-172.17.2.253
vi metallb-layer-2-config-home-net.yml

apiVersion: metallb.io/v1beta1
kind: IPAddressPool
metadata:
name: first-pool
namespace: metallb-system
spec:
addresses:
- 172.21.0.60-172.21.0.65

# save and apply
kubectl apply -f metallb-layer-2-config-home-net.yml
Now install the second MetalLB file to advertise the IP addresses in your LAN. Without this I was only able to access the nginx from on the kubemaster node.
vi metal-lb-layer-2-advert.yaml

apiVersion: metallb.io/v1beta1
kind: L2Advertisement
metadata:
name: example
namespace: metallb-system

# save and apply
kubectl apply -f metal-lb-layer-2-advert.yaml
#Now you can test metallb by deploying Nginx – this is incredibly important, although we are going to only check for the default nginx site, once you have nginx up, you can configure it to proxy your APIs, or use whatever API you like , like Swagger.
git clone https://github.com/jodykpw/metallb-nginx-demo.git
cd metallb-nginx-demo/
edit the values.yaml file
change “type: ClusterIP”
to
type:
type: LoadBalancer
Then run:
helm install nginx-demo ./
After a few moments check that the service is up.
Check that all is fine with the following command, You should see an IP address in the “External-IP” column for nginx.
kubectl get svc
You can copy the external IP address and run curl from the command line or declare it
export SERVICE_IP=$(kubectl get svc --namespace default nginx --template "{{ range (index .status.loadBalancer.ingress 0) }}{{.}}{{ end }}")
curl $SERVICE_IP
Since we ran the secnd yaml which advertises the IP addresses you should see the nginx page from anywhere on the same Lan network. So paste the external IP address into chrome.
Epilogue
After installing this also with a newer ubuntu 22. I noticed that at this point history Sep 2022 , the newest version of containerd does NOT work with kubernetes 1.25 and perhaps 1.24 . You need to use version 1.4.13 of containerd.
I downloaded containerd, runc and (runc might work just from apt) with the following
wget http://ftp.debian.org/debian/pool/main/r/runc/runc_1.1.4+ds1-1_amd64.deb ### MAYBE try to just apt install runc

wget http://ftp.debian.org/debian/pool/main/c/containerd/containerd_1.4.13~ds1-1~deb11u2_amd64.deb